Track Joomla Blog Stats with expo-MAX Real Analytics
Joomla is one of our favorite content management systems—especially when paired with a powerful,
easy-to-use blog traffic analytics tool. Fortunately, expo-MAX Real Analytics works seamlessly
with Joomla, allowing you to track blog visitors, analyze backlinks and see search engine rankings
for each keyword. expo-MAX Real Analytics gives bloggers:
 Comprehensive, real-time reporting on visits and traffic – expo-MAX
Real Analytics generates hour-by-hour data that is available to you immediately. No more waiting
for the next day to see how a post is performing—expo-MAX Real Analytics lets you see traffic
in real time. Comprehensive, real-time reporting on visits and traffic – expo-MAX
Real Analytics generates hour-by-hour data that is available to you immediately. No more waiting
for the next day to see how a post is performing—expo-MAX Real Analytics lets you see traffic
in real time.
 Usability data – expo-MAX Real Analytics tells you which browsers,
screen resolutions and operating systems your readers use so you can optimize your site layout
for the best viewing experience. Usability data – expo-MAX Real Analytics tells you which browsers,
screen resolutions and operating systems your readers use so you can optimize your site layout
for the best viewing experience.
 Session drilldowns and bounce rate reporting – expo-MAX Real
Analytics lets you identify your top content so you know which topics grab your readers’
attention and which posts turn them away. Session drilldowns and bounce rate reporting – expo-MAX Real
Analytics lets you identify your top content so you know which topics grab your readers’
attention and which posts turn them away.
 Search engine ranking reports – expo-MAX Real Analytics lets you
see the page and position your blog posts appear on in all the major search engines. Excellent
for search engine optimization campaigns. Search engine ranking reports – expo-MAX Real Analytics lets you
see the page and position your blog posts appear on in all the major search engines. Excellent
for search engine optimization campaigns.
Setting up Joomla with expo-MAX Real Analytics is quick, easy and free. Simply follow the steps below:
1. Sign up for an expo-MAX Real Analytics account.
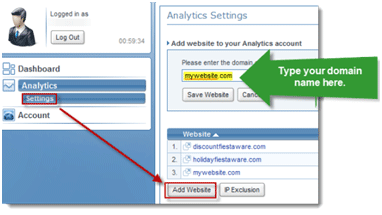
2. Click Analytics and choose Settings. Click Add Website and type your domain name in
the box provided. Click Save Website.
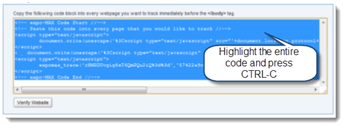
3. Press Control-C to copy the expo-MAX code to your clipboard.
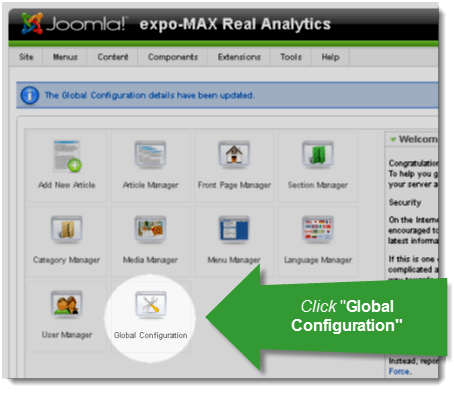
4. Log in to your Joomla account. Click Global configuration.
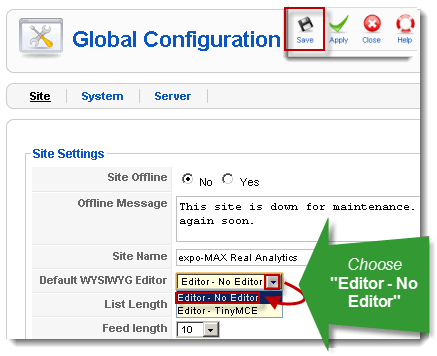
5. Under “Default WYSIWYG Editor,” choose “Editor – No Editor” Click Save.
(Note: You can change this back later.)
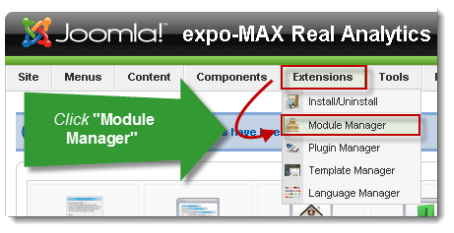
6. On the top menu, Click Extensions and choose Module Manager.
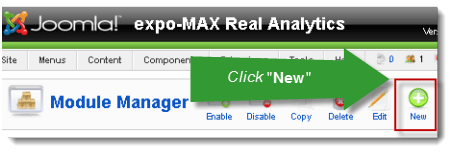
7. Click New.
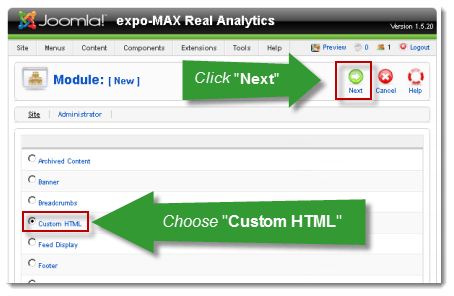
8. Choose Custom HTML and Click Next.
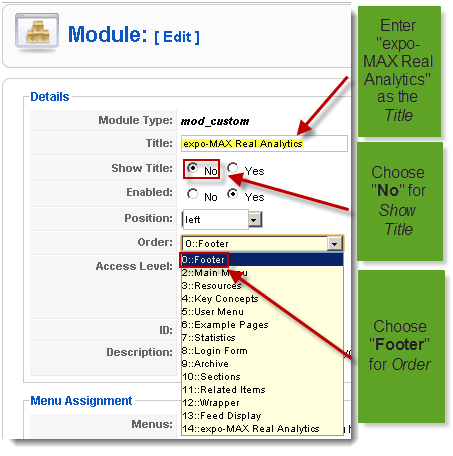
9. In the “Title” field, Type “expo-MAX Real Analytics.” Next to “Show title:” choose No.
Click the drop-down menu next to Order and choose Footer, or an equivalent option.
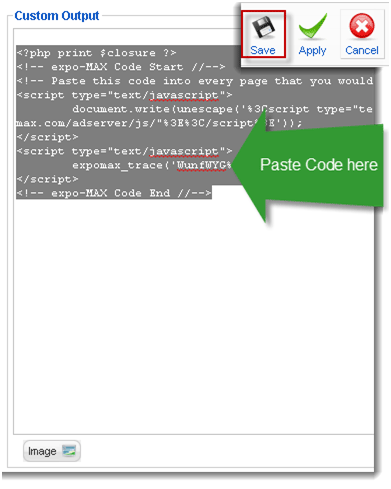
10. Scroll down to the “Custom Output” box. Paste the code into the box. Click Save.
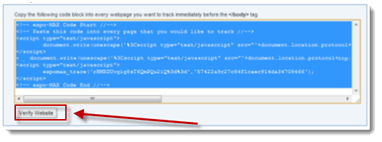
11. Return to your expo-MAX Real Analytics account and Click Verify Website.
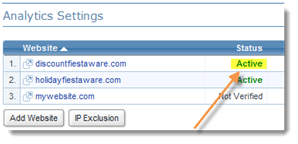
12. You should now see the word Active beneath your website’s Status.
After completing these steps, each page on your Joomla blog will have the expo-MAX Real Analytics
code embedded in it. You will be able to begin collecting and analyzing data immediately. Check out
our documentation section for more tips on
using expo-MAX Real Analytics.
|
|
 | Sign Up Now |  |
|
|
|


